Every homeowner and DIY enthusiast knows that protecting your home from moisture, drafts, and energy loss starts at the surface — and exterior window caulking is one of the most overlooked yet impactful maintenance tasks you can perform. Whether you are sealing gaps around wood frames, vinyl siding, or brick exteriors, doing the job correctly the first time saves you hundreds of dollars in future repairs, lowers your heating and cooling bills, and prevents costly water damage. This comprehensive guide walks you through everything you need to know about exterior window caulking tips, from selecting the right materials to mastering application techniques that professionals swear by. If you have ever wondered how to caulk exterior windows like a pro, or struggled with cracking, peeling, or failed sealant in the past, you are in the right place.

Why Exterior Window Caulking Is Essential for Your Home
Windows are one of the most vulnerable points in your home’s building envelope. Over time, temperature swings, UV exposure, wind, and natural settling create tiny gaps between the window frame and the surrounding wall. These openings may seem insignificant, but they allow air infiltration, moisture penetration, and pest entry — all of which compound into serious structural and financial problems if left unaddressed. Proper exterior window caulking serves as the first line of defense, creating a flexible, waterproof barrier that accommodates building movement while keeping the elements out. Neglecting this maintenance step can lead to rot, mold growth, increased energy consumption, and even interior water stains during heavy rainstorms.
Choosing the Right Caulk for Exterior Windows
Not all sealants are created equal, and using the wrong type of caulk on your exterior windows is one of the fastest ways to guarantee a failed project. The best exterior window caulk for your specific surfaces depends on the material of your window frame, the substrate you are applying to, your climate, and whether you need paintability or maximum flexibility.
Types of Exterior Caulk Compared
| Caulk Type | Best For | Flexibility | Paintable | Durability |
| Silicone | Metal, glass, high-moisture areas | Excellent | No | Very High |
| Polyurethane | Wood, brick, concrete, stucco | Very Good | Yes | High |
| Acrylic Latex | Painted surfaces, minor gaps | Moderate | Yes | Moderate |
| Hybrid Polymer | All surfaces, universal application | Excellent | Yes | Very High |
| Butyl Rubber | Gutters, roofing transitions | Good | No | High |
For most exterior window applications, hybrid polymer caulks and high-quality polyurethane sealants offer the best balance of adhesion, flexibility, and longevity. Silicone sealants are ideal for non-porous surfaces like glass and metal frames but cannot be painted, which limits their cosmetic appeal. Acrylic latex caulks are affordable and easy to apply but tend to shrink and crack faster than their polymer-based counterparts, making them better suited for small, low-stress gaps rather than full exterior perimeter sealing.
Step-by-Step Exterior Window Caulking Process

Following a systematic approach ensures your caulk bond is strong, clean, and built to last. Here is the professional-grade process that experienced contractors use for exterior window sealing projects.
- Inspect the Existing Caulk — Before applying anything new, examine every seam around each window. Look for cracks, gaps, bubbling, or discoloration. Use a screwdriver or awl to test adhesion; if old caulk pulls away easily from the surface, it has already failed and must be fully removed.
- Remove Old Caulk Completely — Use a caulk removal tool, utility knife, or oscillating multi-tool to scrape away all remnants of the previous sealant. For stubborn residue, apply a caulk remover solvent and let it sit for 15 to 20 minutes before scraping again. Clean surfaces must be free of any old adhesive for proper bonding.
- Clean and Dry the Surfaces — Wipe down the gap area with isopropyl alcohol or a dedicated surface cleaner. Remove all dust, dirt, oil, and loose paint particles. Allow the surface to dry completely — moisture trapped under new caulk is a leading cause of adhesion failure.
- Apply Painter’s Tape — Place tape on both sides of the seam, about 1/8 inch from the edge of the gap. This creates clean, straight lines and prevents accidental smearing onto adjacent surfaces. Many professionals consider this the single easiest way to achieve a flawless finish.
- Prepare the Caulk Tube — Cut the nozzle at a 45-degree angle, sizing the opening to match the width of the gap. Larger gaps require a wider cut. Pierce the inner foil seal with a long nail or the built-in puncture tool on the tube nozzle.
- Apply the Caulk — Hold the caulk gun at a consistent 45-degree angle and apply steady, even pressure as you move along the seam. Aim to fill the gap completely in one continuous pass. Do not apply too much — excess caulk that bulges out is harder to smooth properly.
- Smooth the Bead — Immediately after application, run a wet finger, a plastic smoothing tool, or a putty knife dipped in soapy water along the bead to create a concave profile that hugs both surfaces. Smoothing while the caulk is still fresh is critical; once it skin-over, you cannot rework the joint cleanly.
- Remove the Tape — Pull the painter’s tape away at a 45-degree angle before the caulk begins to cure. This typically means removing it within 5 to 10 minutes of application. Wait at least 24 hours before exposing the sealed joints to water or direct sunlight.
Ideal Weather Conditions for Exterior Caulking
Temperature and humidity dramatically affect caulk performance. The ideal range for applying exterior window sealant is between 40°F and 85°F with low to moderate humidity. Applying caulk in direct sunlight on a hot surface causes the skin to form too quickly, preventing proper smoothing. Similarly, cold temperatures below 40°F slow curing times and can result in a weak, brittle bond. Rain within 24 hours of application will compromise adhesion and should be avoided entirely. Check your local forecast and plan your caulking project for a dry, mild window of at least two consecutive days.
Common Mistakes That Cause Exterior Caulk Failures
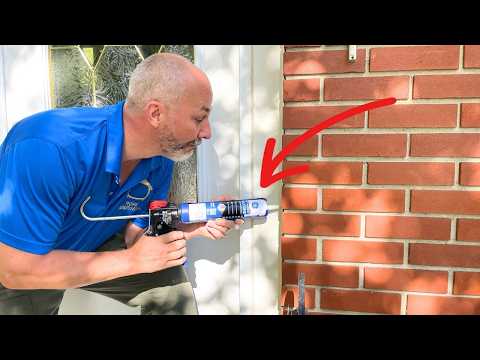
Even experienced DIYers make mistakes that dramatically shorten the lifespan of their window seals. Avoiding these common pitfalls is just as important as getting the application technique right.
- Skipping surface preparation — The number one reason exterior caulk fails is poor surface cleaning. Dirt, old paint, and moisture create a weak bond that cracks within weeks.
- Using the wrong caulk type — Interior acrylic caulk applied to exterior joints will dry out, shrink, and crack within a single season. Always match your sealant to the exposure conditions.
- Overfilling or underfilling the gap — A caulk bead that is too thin will not adhere to both sides of the joint. One that is too thick will sag and take forever to cure properly.
- Applying caulk over painted surfaces without scraping — Paint creates a barrier that prevents the sealant from bonding to the underlying substrate. You must scrape down to bare material or use a primer-sealer designed for caulking over painted surfaces.
- Ignoring expansion joints — Large gaps wider than 1/4 inch should be filled with a backer rod or foam filler before applying caulk on top. Filling a wide gap with a single layer of thin caulk guarantees cracking as the material expands and contracts with temperature changes.
Pro Tips for Long-Lasting Exterior Window Caulk Seals
Want your exterior window caulking to last five, ten, or even fifteen years? These expert tips separate a mediocre job from a professional-grade seal that stands the test of time.
- Use a primer on difficult surfaces — Masonry, brick, and weathered wood benefit significantly from a bonding primer applied before caulking. This step dramatically improves adhesion and extends seal life.
- Invest in a quality caulk gun — A ratchet-strike caulk gun delivers consistent pressure and minimizes the jerky application that causes uneven beads. A poorly applied bead is more prone to cracking and moisture infiltration.
- Apply a thin release coat of dish soap before smoothing — A light coating of diluted dish soap on your finger or smoothing tool prevents the caulk from sticking and creates a polished finish without pulling or dragging the material.
- Schedule annual inspections — Walk around your home every spring and fall, checking exterior window seals for any signs of wear. Small touch-ups are far easier and cheaper than full strip-and-replace projects.
- Choose paintable caulk for visible areas — If the caulked joint will be visible, select a sealant that accepts exterior-grade acrylic or latex paint. This allows you to blend the seal seamlessly with your trim and siding for a clean, finished appearance.
Frequently Asked Questions About Exterior Window Caulking
How often should I replace caulk around exterior windows?
Most exterior window caulk joints should be inspected annually and replaced every three to five years, depending on the type of caulk used, local climate conditions, and exposure to direct sunlight. Silicone and hybrid polymer sealants tend to last longer, while acrylic latex may need replacement more frequently in harsh UV or wet climates.
Can I apply new caulk over old caulk?
You should not apply new caulk directly over old, deteriorated caulk if it is loose, cracked, or peeling. The new sealant will bond to the failed old layer and crack again quickly. However, if the existing caulk is still firmly adhered and intact, light scuffing with sandpaper and cleaning with alcohol may allow new caulk to bond successfully over the old layer.
What is the best caulk for exterior windows in cold climates?
In cold climates, flexible hybrid polymer caulks and polyurethane sealants are the best choices because they remain pliable at low temperatures and resist cracking during freeze-thaw cycles. Avoid silicone caulks on painted wood surfaces, as they cannot be painted and may not adhere well to weathered timber.
How long does exterior caulk take to fully cure?
Most exterior caulks form a surface skin within one to four hours, but full cure — meaning maximum flexibility, adhesion, and water resistance — typically takes between 24 and 72 hours. Always check the manufacturer’s recommended cure time before exposing the joint to rain or heavy water pressure.
Will exterior caulk prevent drafts around my windows?
Yes, properly applied exterior caulk significantly reduces drafts by sealing gaps between the window frame and the wall. However, if you are experiencing noticeable air leakage, the gap may be too large for caulk alone. In these cases, adding foam backer rod to fill the bulk of the gap before applying the caulk bead provides a much more effective draft-proofing solution.
Conclusion
Exterior window caulking is one of the simplest yet most impactful home maintenance tasks available to any homeowner. By selecting the right type of sealant for your specific surfaces, preparing the area thoroughly, and applying the caulk with proper technique, you create a durable, weather-tight barrier that protects your home for years. The tips and methods outlined in this guide — from surface prep and weather timing to pro-level smoothing techniques and annual inspection routines — give you everything you need to achieve professional-quality results on your own. Start with one or two windows this weekend, build your confidence with the process, and expand to the rest of your home. Your windows — and your energy bill — will thank you for it.