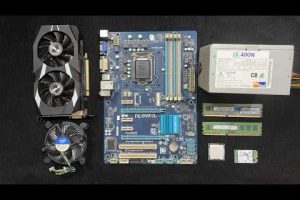
If you have ever wanted to build a gaming PC from scratch, you are not alone. Thousands of gamers dive into custom PC building every year because it offers complete control over every component, tailors performance to your exact needs, and often costs less than buying a pre-built system. This guide will walk you through everything you need to know, from choosing the right parts to completing your first successful boot.
The process might seem intimidating at first glance, but with the right planning, a solid understanding of each component, and a methodical approach, assembling a gaming rig is far more manageable than most people expect. We will cover essential hardware choices, provide a clear build process, compare budget and premium configurations, highlight common pitfalls, and answer the most important questions newcomers have about DIY gaming systems.
Why Build Your Own Gaming PC
There is a reason why the custom PC building community continues to grow every year. When you assemble a gaming rig yourself, you gain advantages that pre-built systems simply cannot match. First, you choose every single part, which means no unnecessary bloatware, no questionable pre-installed software, and no hidden compromises manufacturers make to cut costs. Every dollar goes exactly where you want it.
Another major benefit is upgradeability. A custom-built system is designed with clear expansion paths, meaning you can swap out individual components as new technology emerges without replacing the entire machine. This flexibility is especially valuable in PC gaming, where new GPU architectures and CPU generations arrive frequently and can transform your experience overnight.
Finally, building your own PC is incredibly rewarding. The satisfaction of powering on a system you assembled with your own hands, installing your favorite games, and knowing exactly what is inside the tower is unmatched. It also gives you deeper troubleshooting knowledge that makes maintenance significantly easier over time.
Essential Components of a Gaming PC Build
Before shopping for parts, understand what each component does and how it affects overall gaming performance. Every custom build revolves around carefully chosen hardware that balances your budget with your performance goals.
CPU: The Brain of Your System
The processor handles game logic, physics calculations, and background tasks. For gaming, both Intel and AMD offer excellent options. The AMD Ryzen 5 7600X and Intel Core i5-14600K deliver outstanding mid-range performance without breaking the bank. High-end builds benefit from the Ryzen 7 7700X or Intel Core i7-14700K, which provide additional cores for streaming and demanding multitasking alongside strong single-core gaming speeds. Always verify socket compatibility with your motherboard, as AMD’s AM5 platform supports current Ryzen generations while Intel’s LGA 1700 socket approaches its end with upcoming Arrow Lake processors moving to a new platform.
GPU: The Heart of Gaming Performance
The graphics card is the single most critical component for gaming performance, handling rendering, ray tracing, and frame generation. The NVIDIA GeForce RTX 4060 Ti delivers excellent 1080p and solid 1440p performance, while the AMD Radeon RX 7700 XT competes aggressively at a similar price with strong rasterization and ray tracing. Enthusiasts seeking 4K performance should consider the RTX 4080 Super or RX 7900 XTX. Always match your GPU to your monitor’s resolution and refresh rate, as pairing a high-end card with a 1080p 60Hz display wastes significant potential.

Motherboard: The Foundation of Compatibility

Your motherboard connects every component and determines which CPUs, RAM speeds, and expansion slots are supported. For AMD builds, B650 and X670 chipsets offer PCIe 5.0 support and robust power delivery. Intel builds typically use B760 for budget-friendly options or Z790 for overclocking enthusiasts. Consider the number of M.2 slots, USB port availability, audio quality, and networking features like Wi-Fi 6E or 2.5Gb Ethernet. These details matter more than most beginners realize as your system grows.
RAM: Speed and Capacity for Modern Gaming
System memory directly impacts frame rates and stuttering in open-world games and multitasking scenarios. For most builds, 16GB of DDR5 RAM at 6000MHz or higher is the sweet spot. If you plan to stream or play memory-intensive titles, 32GB provides future-proof headroom. AMD’s Ryzen processors especially benefit from high-frequency RAM with tight timings, as the Infinity Fabric architecture links memory speed directly to overall responsiveness. Always use dual-channel kits—two sticks rather than one—to maximize bandwidth and ensure optimal performance.
Storage: Speed Where It Matters Most
An NVMe M.2 SSD has become the standard for gaming storage, offering dramatically faster load times and seamless boot speeds compared to SATA SSDs or mechanical drives. A 1TB drive handles most gamers’ libraries comfortably, while 2TB options are increasingly affordable for those installing dozens of titles. Install your operating system and most-played games on the NVMe drive for the snappiest experience, and consider a secondary drive for bulk storage and archives.
Power Supply and Case: The Unsung Heroes
A quality power supply unit protects your entire build from power fluctuations and ensures stable electricity reaches every component. Look for units rated 80 Plus Gold or higher from reputable manufacturers like Corsair, Seasonic, or be quiet!. A 750W PSU handles most mid-range builds, while high-end configurations typically require 850W or more. The case serves both aesthetic and functional purposes—prioritize airflow with mesh front panels and multiple fan mounts, and ensure sufficient clearance for your GPU length and CPU cooler height.
Step-by-Step Assembly Process
Once you have gathered all components, the assembly follows a logical sequence most experienced builders complete in under two hours. Follow these steps carefully for a smooth build:
- Install the CPU into the motherboard socket, aligning the golden triangle marker with the socket corner.
- Apply thermal paste or mount the pre-applied cooler, securing it firmly with the correct mounting mechanism.
- Install RAM into the correct slots per your motherboard manual, pressing until the clips click firmly.
- Mount the M.2 SSD onto the board and secure it with the provided screw.
- Place the prepared motherboard into the case using appropriate standoffs, then connect front panel headers for power, reset, and USB ports.
- Route cables neatly for optimal airflow and install the GPU into the primary PCIe slot.
- Connect all power cables from the PSU to the motherboard, CPU, GPU, and storage drives.
- Perform a final visual inspection of every connection before closing the case and powering on.
The first boot is always the most exciting moment. Power on the system, enter BIOS to confirm all components are detected, install Windows from a USB drive, then install GPU and chipset drivers. Once everything runs stable, load up your favorite games and enjoy the fruits of your labor.
Budget Gaming PC vs. High-End Builds
Understanding where your money goes helps you make smart purchasing decisions. The comparison below illustrates three tiers of custom gaming PC builds, each targeting a different performance level and price point.
| Component | Budget (~$700) | Mid-Range (~$1200) | High-End (~$2000) |
| CPU | AMD Ryzen 5 7600 | Intel Core i5-14600K | AMD Ryzen 7 7700X |
| GPU | RTX 4060 | RTX 4070 Super | RTX 4080 Super |
| RAM | 16GB DDR5 5600MHz | 16GB DDR5 6000MHz | 32GB DDR5 6400MHz |
| Storage | 1TB NVMe SSD | 1TB NVMe SSD | 2TB NVMe SSD |
| PSU | 650W 80+ Bronze | 750W 80+ Gold | 850W 80+ Gold |
| Case | Mid-tower airflow | Mid-tower mesh | Full-tower airflow |
| Estimated Total | ~$700 | ~$1200 | ~$2000 |
The budget build delivers excellent 1080p gaming at high settings, the mid-range configuration handles 1440p smoothly, and the high-end setup pushes 4K performance with ray tracing enabled. Choose the tier that matches your monitor resolution, gaming preferences, and budget priorities.
Common Mistakes Beginners Make When Building a PC
Even with thorough preparation, first-time builders occasionally make mistakes that waste time, money, or even damage components. The most common error is forgetting to connect the CPU power cable (the 4+4 pin connector near the top of the motherboard). Without this connection, the system will not boot, and many beginners panic unnecessarily. Another frequent issue is mismatched parts—buying a motherboard with an incompatible socket for your chosen CPU or selecting RAM that exceeds what the motherboard supports.
Underestimating power supply requirements is another costly mistake. Running a high-performance GPU on an insufficient or low-quality PSU can cause system instability, random shutdowns, and in worst-case scenarios, permanent hardware damage. Always verify your total system power draw and add a comfortable buffer. Finally, do not force any component into a socket or slot. If something does not fit easily, stop, double-check the alignment, and try again rather than applying excessive pressure.
Frequently Asked Questions
How long does it take to build a gaming PC for the first time? Most first-time builders complete the assembly process in three to five hours, depending on experience level and cable management preferences. Research and component selection typically takes longer than the actual build itself. Watching a detailed build tutorial video before starting can significantly reduce assembly time and help avoid common mistakes.
Can I upgrade individual parts after building my PC? Absolutely. One of the greatest advantages of a custom build is modularity. You can upgrade the GPU without replacing the rest of the system, swap in a larger CPU cooler, add more RAM sticks, or install additional storage drives. As long as your motherboard socket and case support the new components, incremental upgrades are straightforward and cost-effective.
Do I need to install CPU cooler thermal paste separately? Many aftermarket CPU coolers come with pre-applied thermal paste on the base plate. If you are using the stock cooler or applying separate compound, a small pea-sized dot or thin line across the center of the CPU is sufficient. The cooler’s pressure spreads it evenly for optimal heat transfer, so you do not need to spread it manually.
What is the best operating system for a custom gaming PC? Windows 11 remains the dominant choice for PC gaming due to its broad driver support, DirectX 12 Ultimate compatibility, and compatibility with the vast majority of game titles and anti-cheat systems. Linux alternatives like SteamOS are growing in popularity, especially for handheld gaming PCs, but Windows still offers the most seamless and universally supported gaming experience.
How do I know if my power supply is powerful enough for my build? Use an online PSU calculator from reputable manufacturers or sites like OuterVision. Input all of your components, including the GPU, CPU, and number of storage drives. These tools estimate your total system power draw and recommend an appropriate PSU wattage, typically with a 20% safety margin to ensure stable operation under heavy gaming loads.
Final Thoughts
Building a gaming PC is one of the most rewarding projects a PC enthusiast can undertake. The journey from selecting components to seeing your system boot up for the first time teaches valuable technical skills, deepens your understanding of hardware, and ultimately delivers a machine tailored exactly to your needs. Whether you are targeting a budget-friendly 1080p setup or a premium 4K gaming powerhouse, the principles of smart component selection, careful assembly, and methodical troubleshooting remain the same.
Start with a clear budget, research each component thoroughly, and do not be afraid to ask questions in online communities. The PC building community is welcoming and incredibly knowledgeable. With patience, attention to detail, and the guidance provided in this article, you will be well on your way to building the perfect gaming rig that delivers the performance and experience you deserve.