


App home automation has transformed the way millions of people interact with their living spaces. What once felt like a futuristic concept reserved for tech enthusiasts now sits comfortably within reach of everyday homeowners and renters alike. Whether you want to dim the lights with a voice command, lock your front door from halfway across the world, or build an entire routine that adjusts your thermostat, blinds, and coffee maker before you even wake up, the right home automation app makes it all possible. In this comprehensive guide, we will walk you through everything you need to know about choosing, setting up, and optimizing a home automation app for your lifestyle.
What Is App Home Automation?
App home automation refers to the use of smartphone applications to control, monitor, and manage connected devices within a home environment. These apps serve as the central command center for smart devices such as lighting systems, security cameras, thermostats, smart locks, plugs, sensors, and even kitchen appliances. Instead of manually flipping switches or adjusting dials, users can automate routines, trigger actions based on conditions, and manage their entire household from a single interface on their mobile device.
The ecosystem behind app home automation relies on wireless communication protocols like Wi-Fi, Zigbee, Z-Wave, Bluetooth, and Matter — a new universal standard gaining rapid traction across the industry. Each protocol has its strengths, and the best apps support multiple protocols to ensure maximum compatibility.
How App Home Automation Works
Understanding the underlying mechanics helps you make smarter purchasing decisions. At its core, app home automation depends on three components working together seamlessly.
- Smart Devices: These are the hardware products — smart bulbs, sensors, cameras, locks, and more — that connect to your home network.
- The Hub or Bridge: Some systems require a central hub (like a SmartThings hub or Home Assistant server) that translates signals between different protocols and routes commands to the correct devices.
- The App: The application on your phone or tablet that lets you send commands, create automations, view live feeds, and monitor device status in real time.
When you tap a button in your app or trigger an automation, the command travels through your home network to the hub or directly to the device, which then executes the action. This process typically takes less than a second, creating an experience that feels instantaneous and intuitive.
Key Features to Look For in a Home Automation App
Not all home automation apps are created equal. Before committing to a platform, evaluate these critical features that separate a mediocre app from an exceptional one.
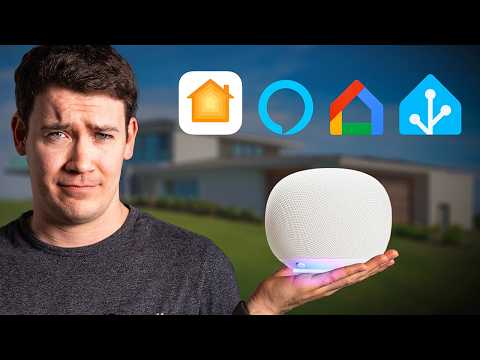
1. Cross-Platform Device Compatibility
The best app for home automation supports a wide range of brands and device types. You should not be forced to manage your lights in one app, your locks in another, and your thermostat in yet a third. Look for apps that integrate with popular ecosystems like Amazon Alexa, Google Home, Apple HomeKit, and the Matter protocol.
2. Robust Automation Engine
A powerful automation engine allows you to create conditional rules — often called “if this, then that” scenarios. For example, you can set it so that when your front door sensor detects motion after sunset, the porch light turns on and a camera recording begins automatically.
3. Remote Access and Cloud Reliability
You should be able to control your home from anywhere with an internet connection. Check reviews for latency issues and downtime, because an unreliable cloud service defeats the entire purpose of automation.
4. Voice Assistant Integration
Seamless compatibility with Siri, Google Assistant, and Alexa allows hands-free control, which is especially valuable for accessibility and convenience.
5. Security and Privacy Controls
Since your automation app has access to your home network and personal data, look for apps that offer end-to-end encryption, two-factor authentication, and transparent privacy policies.
Best App Home Automation Platforms Compared
Choosing the right platform depends on your priorities — whether that is ease of use, device variety, budget, or advanced customization. The table below compares the most popular options available today.
| Platform | Best For | Device Compatibility | Price | Learning Curve |
| Google Home | Google ecosystem users | Excellent (10,000+ devices) | Free | Low |
| Apple HomeKit | Apple device owners | Good (limited to certified devices) | Free | Low to Medium |
| Amazon Alexa | Voice-first automation | Excellent (10,000+ devices) | Free (premium add-ons available) | Low |
| Samsung SmartThings | Broad device support | Very Good (Zigbee, Z-Wave, Wi-Fi) | Free (premium plans available) | Medium |
| Home Assistant | Power users and developers | Exceptional (1,800+ integrations) | Free (open source) | High |
| Hubitat | Local processing enthusiasts | Very Good (Zigbee, Z-Wave) | One-time fee (~$100) | Medium to High |
As the comparison shows, beginners often gravitate toward Google Home or Apple HomeKit for their simplicity, while advanced users frequently migrate toward Home Assistant or Hubitat for granular control and local processing capabilities that do not depend on cloud connectivity.
How to Get Started With App Home Automation
If you are new to the world of smart home technology, diving in too deep too quickly can lead to frustration. Follow this step-by-step approach to build a solid foundation.
Step 1: Define Your Goals
Ask yourself what problems you want to solve. Do you want to save energy? Improve security? Add convenience? Write down your top three priorities before purchasing any devices.
Step 2: Choose Your Ecosystem
Pick an ecosystem that aligns with your existing devices. If you own an iPhone and use iCloud, Apple HomeKit or Google Home may be the most natural fit. If you have an Amazon Echo, the Alexa app gives you an immediate head start.
Step 3: Start Small
Begin with one or two smart devices — a smart plug and a smart bulb are excellent starting points. Download the corresponding app, connect the devices, and experiment with basic controls before expanding.
Step 4: Build Your First Automation

Once you are comfortable, create your first routine. A popular starter automation is a “Goodnight” scene that turns off all lights, locks the doors, lowers the thermostat, and arms the security system with a single tap or voice command.
Step 5: Expand Gradually
Add sensors, cameras, and more complex devices over time. Each new addition should serve a clear purpose in your overall automation strategy rather than being a random purchase.
Advanced App Home Automation Strategies
Once you have mastered the basics, these advanced techniques will elevate your smart home to the next level.
Creating Multi-Condition Automations
Instead of simple single-trigger automations, combine multiple conditions. For instance, set your living room lights to turn on only when motion is detected, it is after sunset, and someone is home. Advanced apps like Home Assistant allow you to chain virtually unlimited conditions using Boolean logic and sensor data.
Integrating Third-Party Services
Many automation platforms support webhook-based integrations with services like IFTTT, Zapier, or custom APIs. This means you can trigger a home automation action from an external event — such as receiving an email from your airline, which automatically adjusts your thermostat because you are about to arrive home.
Local Processing for Reliability
Cloud-dependent automations fail when your internet goes down. Setting up a local hub like Home Assistant or Hubitat ensures that your core automations continue running even without an internet connection. This is one of the most important yet overlooked aspects of serious app home automation.
Expert Tips for Maximizing Your Smart Home Setup
- Prioritize Wi-Fi coverage: Smart devices depend on a strong, stable network. Invest in a mesh Wi-Fi system if your home has dead zones.
- Use Zigbee or Z-Wave devices when possible: These protocols create a mesh network that is more reliable than Wi-Fi alone for large homes.
- Regularly update your app and firmware: Updates patch security vulnerabilities and often improve performance and add new features.
- Group devices by room: Organizing your smart devices into rooms within the app makes control faster and automations easier to manage.
- Monitor energy usage: Many smart plugs and thermostats provide energy consumption data — use this information to identify waste and lower utility bills.
- Set up geofencing: Use your phone’s location to trigger automations when you leave or arrive home, such as turning off lights or disarming the security system.
Frequently Asked Questions
1. What is the best app for home automation for beginners?
For most beginners, Google Home and Apple HomeKit offer the most intuitive experience. Both apps feature guided setup wizards, visual device management, and pre-built automation templates that require no coding. The Google Home app, in particular, supports a massive library of third-party devices and provides excellent step-by-step onboarding.
2. Is app home automation secure from hacking?
No system is 100% immune, but reputable platforms invest heavily in security measures including end-to-end encryption, regular firmware updates, and two-factor authentication. To maximize your home automation app security, always use strong, unique passwords, enable two-factor authentication, keep your apps updated, and avoid connecting untrusted third-party devices to your network.
3. Can I use multiple home automation apps together?
Yes, and many users do. Platforms like Home Assistant and SmartThings act as universal hubs that can pull devices from different ecosystems into one unified interface. You can also use the Matter protocol, which is designed specifically to bridge compatibility gaps between Apple HomeKit, Google Home, Amazon Alexa, and Samsung SmartThings.
4. How much does a home automation app cost?
The app itself is typically free. However, you will need to purchase compatible smart devices, which range from $10 for a basic smart plug to $250 or more for a smart thermostat. Some platforms offer premium subscription tiers — usually $3 to $15 per month — that unlock advanced features like detailed analytics, extended cloud storage for cameras, and additional automation blocks.
5. Do I need a hub for app home automation?
It depends on your device ecosystem. Many Wi-Fi-only smart devices connect directly to your app without a hub. However, if you use Zigbee or Z-Wave devices, you will need a compatible hub or bridge. For the most advanced setups, a dedicated hub like Home Assistant or Hubitat provides local processing, faster response times, and greater reliability than cloud-dependent alternatives.
Conclusion
App home automation is no longer a luxury — it is a practical, accessible way to make your home more efficient, secure, and responsive to your daily life. Whether you are taking your first steps with a single smart plug or engineering complex multi-device routines through a platform like Home Assistant, the key is to start with clear goals, choose the right ecosystem, and expand thoughtfully over time. The platforms and devices available today have never been more powerful, more affordable, or more interoperable. Invest the time now to learn your chosen app inside and out, and you will reap the rewards of a truly intelligent home for years to come.